

 Thanks: 0
 Likes: 0
 Needs Pictures: 0
 Picture(s) thanks: 0
Results 106 to 118 of 118
-
29th April 2012, 04:03 PM #106
 Distracted Member


- Join Date
- May 2010
- Location
- Lower Lakes SA
- Age
- 59
- Posts
- 2,557

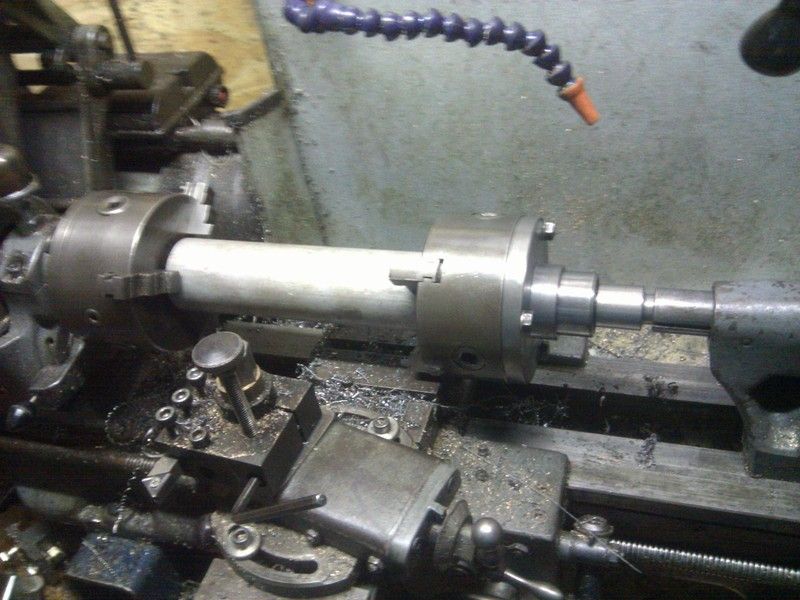
Jackaroo, I second Dave's encouragement, but have a couple of questions: Is that a 3 jaw? And how is the backplate fixed to the bearing?
I will just say again it wasn't my idea. It came up in a discussion on PM about how to set up steadies. This is applicable when you either need to machine the end - like boring - or a centre drilling is not available and the work is too big for the spindle. So you would turn a pad, set your steady to that, remove the TS chuck and centre drill, then fit a TS centre.
It's not really intended for machining between chucks. The idea did occur to me but I discarded it because I couldn't see the advantage over a centre. I suppose bigger bearings than a live centre could be an advantage, but I'd be worried about slight misalignments making the work chafe in the jaws and maybe work loose. That would apply more so if using 3 jaw chucks. However I haven't tried it and you have. How did it seem?
-
29th April 2012 04:03 PM # ADSGoogle Adsense Advertisement
- Join Date
- Always
- Location
- Advertising world
- Age
- 2010
- Posts
- Many
-
29th April 2012, 04:47 PM #107
Senior Member
- Join Date
- Apr 2012
- Location
- Melbourne
- Age
- 57
- Posts
- 122
Couldn't you have fitted a bung inside the pipe that had a centre in it.
Two chucks are great for holding heavy work like over a tonne that can't be supported properly by a centre.
Also for odd shaped eccentric shafts.
Guess if you have the time it's another way of doing it.
-
29th April 2012, 05:50 PM #108Dave J Guest
I have been wanting to make one myself for a long time now, but just cant bring myself to pay $100 odd dollars for a 125mm chuck that I want to use. I will used a 4 jaw as it will only be an occasional use and will need the accuracy and not the speed.
There have been a few turning jobs where it would have come in handy for me.
Dave
-
29th April 2012, 07:24 PM #109
Senior Member
- Join Date
- Jun 2007
- Location
- Vic
- Age
- 48
- Posts
- 200
Hi Bryan
Yes, the chuck is 3 jaw. The bearing and backplate is interference fits. I tried it today and very happy with it. The centre steady on the ML7 is not that big. I guess once I clamp at both ends then lock the tailstock then its quite safe to operate.
Thanks on the bung idea Clubman7.
Hi DaveJ, the bearing is double roller bearing so its quite good.
-
11th July 2012, 04:22 PM #110
Distracted Member
- Join Date
- May 2010
- Location
- Lower Lakes SA
- Age
- 59
- Posts
- 2,557
Well the more I thought about it the more I got the wind up about getting the grinder set up accurately enough.
Call me chicken but I decided to have a play with some abrasive paper on a mandrel, as suggested by RC.
I will let the pictures do most of the talking.
Before. I had actually done a little work at this point. But the offending ridge can be clearly seen.

280 grit paper trimmed to fit mandrel. (I know Bob will love my drive dog.)

I tried it by hand first but that got old. This is 400 rpm, as fast as I dared.
[ame=http://www.youtube.com/watch?v=pTxhApgcT7A&feature=youtube]tailstockrepair - YouTube[/ame]
At first I had a centre in the chuck locating the mandrel, but later switched to a flat pad so it could float.
After wearing out half a dozen bits of paper. The taper on the right is virginal so should be correct.

Here's a before & after looking up the spout.


So I'm calling that fixed. Thanks everyone for the input, and especially to MichaelG for the loan of the TPG and Garry Edwards for the reamer.
I will get both those items returned asap.
-
11th July 2012, 04:32 PM #111
Pink 10EE owner
- Join Date
- Aug 2008
- Location
- near Rockhampton
- Posts
- 4,304
Very nice work there...Looks good...
Light red, the colour of choice for the discerning man.
-
11th July 2012, 04:54 PM #112
.
- Join Date
- Nov 2008
- Location
- Perth WA
- Age
- 71
- Posts
- 5,650
Dog Lover.
Nice dog Bryan,
Sure beats the cast iron versions I have with their nasty hardened set screws. And sure beats fooling around with bits of shim trying to prevent those screws from gouging a nicely turned surface. I need to make a copy.
BT
-
11th July 2012, 05:06 PM #113
GOLD MEMBER
- Join Date
- Jul 2010
- Location
- Melbourne
- Posts
- 7,775
Chicken... though I cant say I blame you.
 The spindle in my mill could use some work but I'm putting that off.
What made the paper turn with the mandrel?
How did you do the bluing? Shouldnt you blue the taper then drive the arbor in with a soft hammer?
I like the flat pad idea.
Stuart
-
11th July 2012, 05:50 PM #114
Distracted Member
- Join Date
- May 2010
- Location
- Lower Lakes SA
- Age
- 59
- Posts
- 2,557
Bob, I was referring to the junkyard finish. If you make a copy I'm sure it will be much nicer. Chrome bar is pretty slippery so I used a roll pin as a drive key. I ground a slight groove in the bar to engage it. I've never had much luck with those cast dogs. Originally Posted by Anorak Bob

Stuart, I'm not really sure why the paper turned but it consistently did, as long as I got each new piece started gently by hand. That seemed to give it the right idea. Originally Posted by Stustoys
 I used diesel as a lubricant but it got on both sides of the paper so I don't think that made any difference.
I blued the socket with this precision instrument. Could have used a bit more length.

... then inserted the taper. Tried tapping it in and tried rubbing around. Didn't seem to make much difference.
-
11th July 2012, 06:40 PM #115
Philomath in training
- Join Date
- Oct 2011
- Location
- Adelaide
- Age
- 59
- Posts
- 3,149
Good one Bryan.
Michael
-
11th July 2012, 07:57 PM #116
I break stuff...
- Join Date
- Aug 2010
- Location
- Melbourne
- Posts
- 539
Now that is a solution I like - and might just steal to help me restore my own tailstock from its own sorry state. Brilliant! Originally Posted by Bryan
-
11th July 2012, 08:53 PM #117
Distracted Member
- Join Date
- May 2010
- Location
- Lower Lakes SA
- Age
- 59
- Posts
- 2,557
Then for you or anyone else considering this method I will add a few details. I tried using a standard MT arbour but with paper around it the engagement was too short. So I needed to make an extra long one and for that I needed a gauge. I turned up a plug to suit my spindle (so it would be useful later), rough bored a MT4 socket and finish reamed it. The reamer (a quality one) gave me confidence the geometry was correct. Originally Posted by Jekyll and Hyde
To turn the male taper I used the tailstock offset method because it gave me power feed and also I felt I had more control over the adjustments. After a few cycles of cut-blue-adjust I got it pretty good. One slight snag was that the mandrel was longer than the gauge socket - which was limited by the reamer - so I wasn't getting a reading on the small end. I just had to hope for the best.
The handwheel was used to apply pressure but was pretty insensitive. With a hand on the quill I found I could ride the backlash in the key and get a feel for how much torque was being gnereated. When I couldn't resist the torque I figured that was enough. The hand also told me how hot things were getting. I started with low speeds and worked up to 400 rpm. I figured high speed and light pressure was better, but that's just a hunch.
One good thing about this method is the removal rate is low. If you blue up every time you change paper (about every 30-60 seconds) you'll be in full control. That's why I changed to fully floating - because I saw I was losing contact on the bottom. With a floating mandrel I don't see any danger of altering the socket's alignment. Where the abrasive has a large contact area the removal rate will be much lower than where the contact area is small. So you will be removing the high spots first. That's my theory anyway.
-
11th July 2012, 09:08 PM #118
I break stuff...
- Join Date
- Aug 2010
- Location
- Melbourne
- Posts
- 539
That was exactly the part that most appeals to me, not having to get a dead perfect alignment of headstock to tailstock! Thanks for the extra details too, I'll have to file it away in the box marked "Uses for spare roundtoits". I think the box takes up more space than my Bridgeport clone.... Originally Posted by Bryan

Similar Threads
-
Suitable oil for hardened rods
By Ch4iS in forum METALWORK FORUMReplies: 4Last Post: 31st October 2011, 06:12 PM -
Which Grinding Wheel For Grinding Tungsten Electrodes
By Metal Head in forum WELDINGReplies: 14Last Post: 8th August 2009, 02:23 PM -
turning hardened steel
By tanii51 in forum THE HERCUS AREAReplies: 3Last Post: 24th July 2009, 12:04 AM -
Milling hardened steel
By glock40sw in forum METALWORK FORUMReplies: 14Last Post: 26th July 2007, 04:46 PM -
Hardened Shellac.
By Dylan SJ in forum FINISHINGReplies: 2Last Post: 24th February 2003, 03:41 PM
